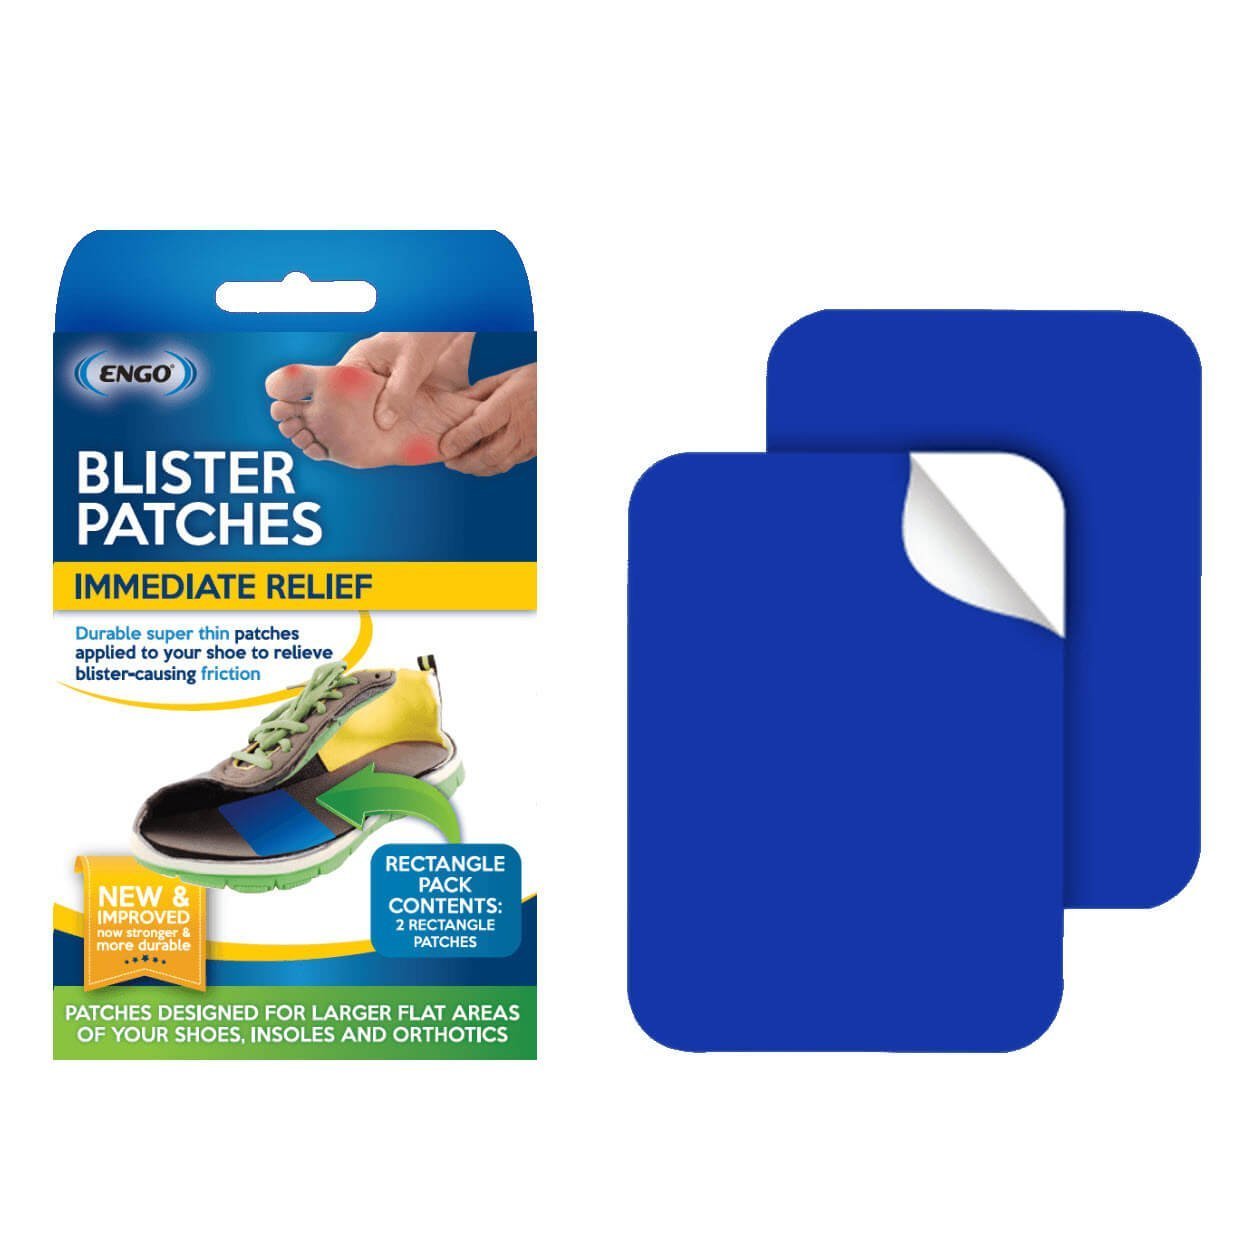
Blisters vary in size. When you have big blisters on your feet, you need big area protection. That's where ENGO Rectangle Patches come in. They're ENGO's biggest patches and they're the ones for you especially if you get big blisters under your foot. Or around your heel and ankles in boots. Read on, or watch the video, for pro-tips on how to use the 2 Rectangle Patches in the ENGO RECTANGLE PACK to get the best results for your blisters.
Where Can You Put ENGO Rectangle Patches?
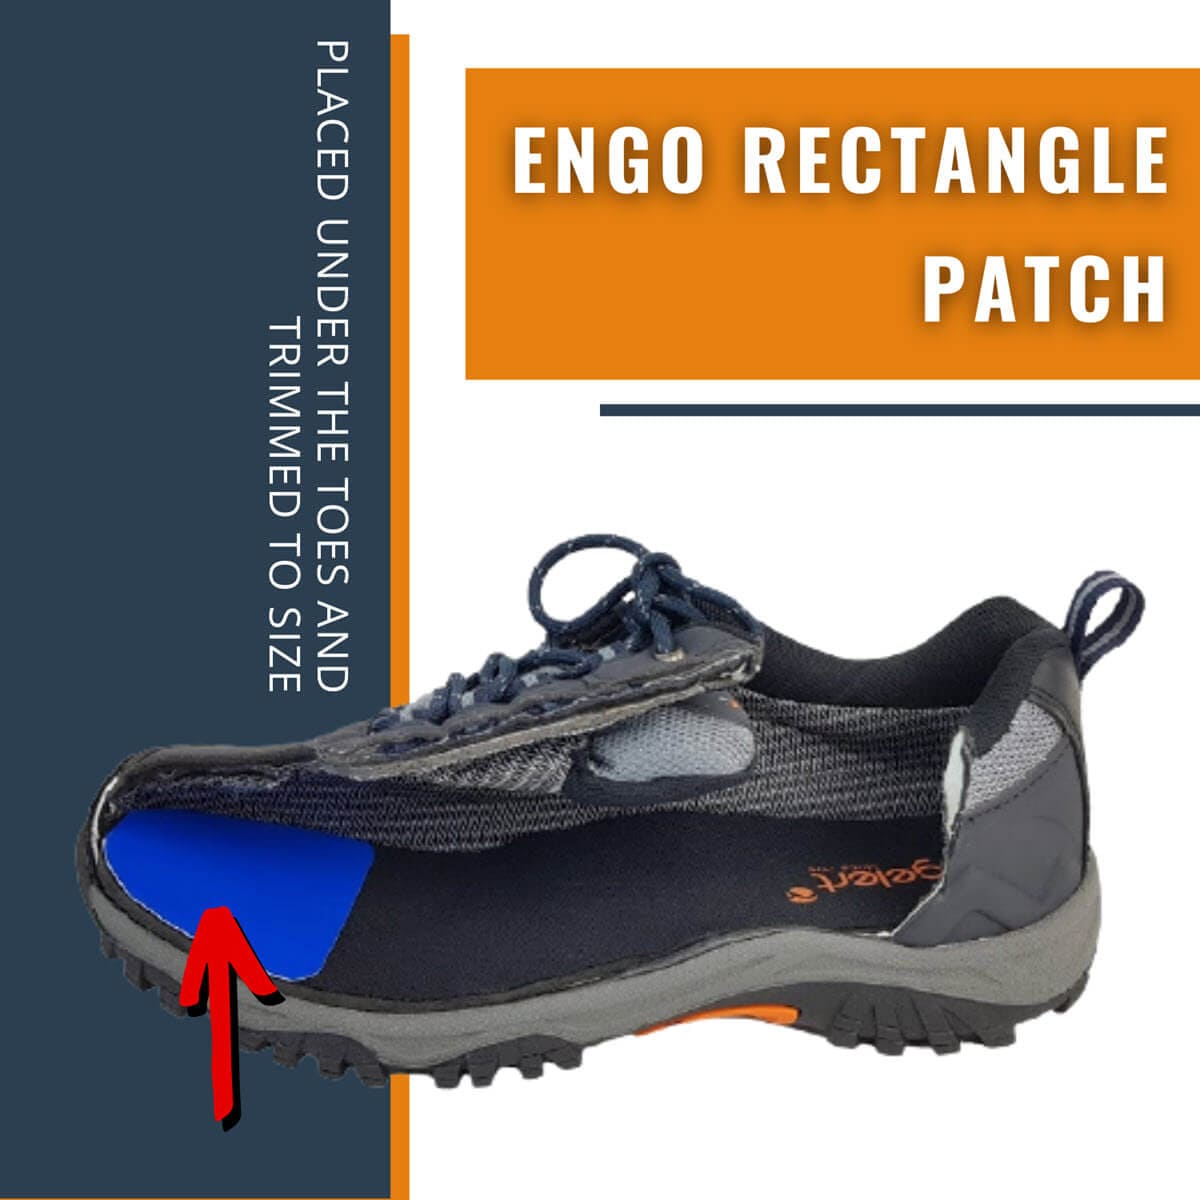
1) Blisters Under the Ball of the Foot
The classic type of blister that Rectangle Patches are used for are blisters under the ball of the foot. Most people get away with using the large oval Patches for these blisters. They’re smaller than the Rectangle Patches but usually enough. However, sometimes you just need larger coverage for bigger or wider blisters. At 9.5cm wide (that’s 3.7 inches) they’ll cover the whole forefoot in small to medium sized shoes.
Mark The Spot
Of course, it’s always important to make sure you’re putting the patch in the right spot. Rather than just guessing, take your insole out, stand on it and mark the outer margins of your blister area. Use a pen to make sure of it, or eyeball it very carefully. Then place your patch so your blister will be right in the middle. And the patch needs to extend about 1cm further on all sides to allow for the natural movement of bones when you walk and run. 1cm – that’s about half an inch, extra on all sides for adequate coverage.


Big Feet
Now, if you’ve got really big feet and need full width coverage, right across the ball of the foot, a single ENGO Rectangle Patch isn’t going to be wide enough. If you’re not sure, get your ruler out and measure the width of your insole. You know these are 9.5cm or 3.7 inches across, so if your insole is wider than that, you’ll need an extra patch.
- You can use an offcut of additional Rectangle Patch
- Or you could use a Large Oval Patch along-side it
It all depends on where you need your protection. Alternatively, if you need big coverage but not full coverage across the width of the foot, just prioritise that area. So if it’s the central metatarsal heads, you can place it centrally. Or if it’s the big toe side of the foot that gets blisters and not the little toe side, prioritise that area. To be honest, it’s a good idea to only cover the areas that need it. Just make sure you’ve got your 1cm extra on all sides to allow for adequate coverage.
2) Tips Of Toes
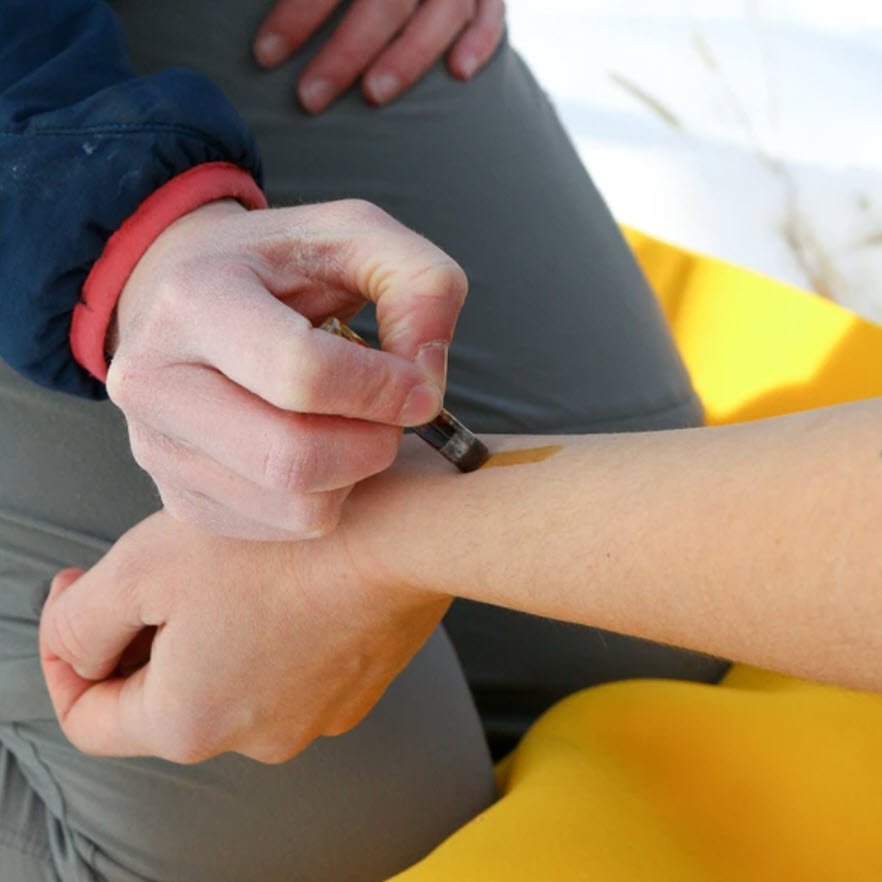
While blisters aren't overly common under your toes, they are common on the tips of the toes when your toes bend over. Like when you have hammertoes or clawed toes. If you want to take friction out of the equation, get an ENGO Rectangle Patch and do this like the picture below.
3) Two Adjacent Blister Areas
a) Big Toe & 1st Forefoot Joint
Another situation where ENGO Rectangle Patches are perfect is when you’ve got two adjacent areas that blister. The most common of these is the big toe and first forefoot joint. A bunion or a stiff big toe often sees blisters in these two areas. These blisters are almost always edge blisters. Edge blisters are blisters whose origins correspond to where the edge of the insole meets the side of the shoe – right at that transition from horizontal to vertical. Now you might be tempted to place one Rectangle Patch over the whole area. But I suggest you don’t, for 3 reasons:
- Firstly, there’s no way you’ll get it on without folds and creases.
- Secondly, you won’t be able to remove your insole.
- And most importantly, if your insole is padded and compresses with each step you take, like most of them are, that patch is going to be dragged down the side of the shoe with each step you take, and it will dislodge prematurely.
Use The Two-Patch Technique For Edge Blisters
Instead, use a Rectangle Patch on the horizontal insole surface; and a separate patch on the vertical shoe surface. I show you how to do it, step by step, in the video at the top of this article. But here's the gist of it.
- Step 1: Take your insole out and stand on it. Place the Rectangle, cutting the excess off with scissors.
- Step 2: Pop your insole back in your shoe and mark on the shoe where the patch starts and finishes.
- Step 3: Now you need to use those markers to place your shoe patch. So take the insole out and place your shoe patch accordingly.
A full ENGO Rectangle Patch on the shoe surface is going to be far too big and a bit of a waste. The off-cut that you just trimmed is probably going to be too small. So, you could cut another Rectangle in half, and use that, absolutely. However, I prefer to use large ovals instead. You’ll need two of them to span the dimensions of the Rectangle Patch. And you’ll need to overlap them, which is completely fine to do. Put the furthest one on first, followed by the closer one. That’s the way I do it and it works well. Why the Large Oval ENGO Patches? Well, it’s just a fact that, the smaller the patch and the more rounded the corners, the easier it is to apply without creases, to bendy contoured areas of your shoe like this.
Access
The further into the shoe you get, the trickier it becomes to apply the patches neatly. It’s simply a matter of access and visibility. Absolutely, take the laces right out to maximise access, that’s very smart. But whatever way you choose to do it, make sure your patches line up so you’re protected right along that edge. Because it’s only the length of where the two patches meet that you’re protected from these blisters.
b) Arch & 1st Forefoot Joint
The other area where an ENGO Rectangle Patch is just the shot is blisters under the arch and first forefoot joint. Again, they are often edge blisters so you'll need to cover both the horizontal insole surface and vertical shoe surface. When you use two large ovals on the shoe, you could call this the 3-Patch Technique. Here's a picture of it.
4) Heel/Ankle Blisters
For classic back-of-heel blisters, ENGO has specially-designed Heel Patches, in the ENGO Heel Pack. They’re great for your standard running shoes, cleats, casual and dress shoes. Because it’s very clear where the patch needs to go and they’ll give you all the protection you need. But in boots, like workboots or even skates and ski boots for example, it’s less obvious, and there’s sometimes a bit more movement of the foot in the boot. A Rectangle gives more certainty you’ve got the right area covered. As always, put your boot on, feel for where your irritation is and mark it. You can mark the spot on the inside or outside of the shoe – whatever you feel is easiest to place your patch. Remember, your blister area needs to be right in the middle with at least 1cm extra on all sides for adequate protection.
Pro-Tip: Round the corners
Before you place your patch, here’s a pro-tip. If your boot is kind of padded and contoured around the heel or ankle bones or wherever you’re applying this patch, my advice is to round the edges of that ENGO Rectangle Patch so it looks more like an Oval shape. The reason is, big square or rectangular patches go best on big flat surfaces. By rounding the corners, you’re going to make it much easier to apply your patch to this contoured area without creating folds and creases that may ultimately irritate your skin further. Keep this little trick in mind – it may come in very handy!
Watch the top!
The other thing I need to mention for patches in this back part of the shoe is, you need to protect the top of the patch as you push your foot down into your shoe or boot. The last thing you want to do is have your sock catch the top of the patch and drag it down. When you do this again and again, your patch is going to loosen and you’ll just have to replace it sooner than you should. So be sure to undo your laces adequately and even use your fingertips to protect the top of the patch as you push your foot in and down.


ENGO Rectangle Pack Reviews
I wish I found theses patches years ago. I bought a new pair of hiking boots and while breaking them in developed blisters on both heels. Found the ENGO patches online and I’ve been blister free ever since. The patches I put in that pair off boot stuck to the boot and created a super smooth surface. They’ve been in there for over a year and many wet and sweaty miles with out coming off. Great product! ~ Matt M
Horrible blisters on the ball of my foot meant that I use to tape up every time I wanted to walk more than 15 km. After putting an Engo onto my innersole, I no longer needed to tape. I walked around 900km on the Camino Frances on the same ol' inners and now I'm back buying more for my next adventures on the Cape to Cape and Bibbulmun. Thanks! ~ Kathryn N
My daughter has suffered with blisters for over 2 years whilst playing the netball season. She is a mid court player so very active on the court. Blisters appear in the same area every time and usually ends up with blister over blister even when we have taped them, padded them and tried other methods. We even got told it was her shoes and bought new ones... I was very sceptical when told about blister prevention but thought it certainly couldn’t do any worse than she already had tried. Wow!! Since the first game she played, we have not had one issue with her feet. Highly recommended and have told many in our sporting club to try these ? Thankyou, , you have not only saved my daughter ongoing suffering but saved me a lot of money on unnecessary products that don’t work. ~ K
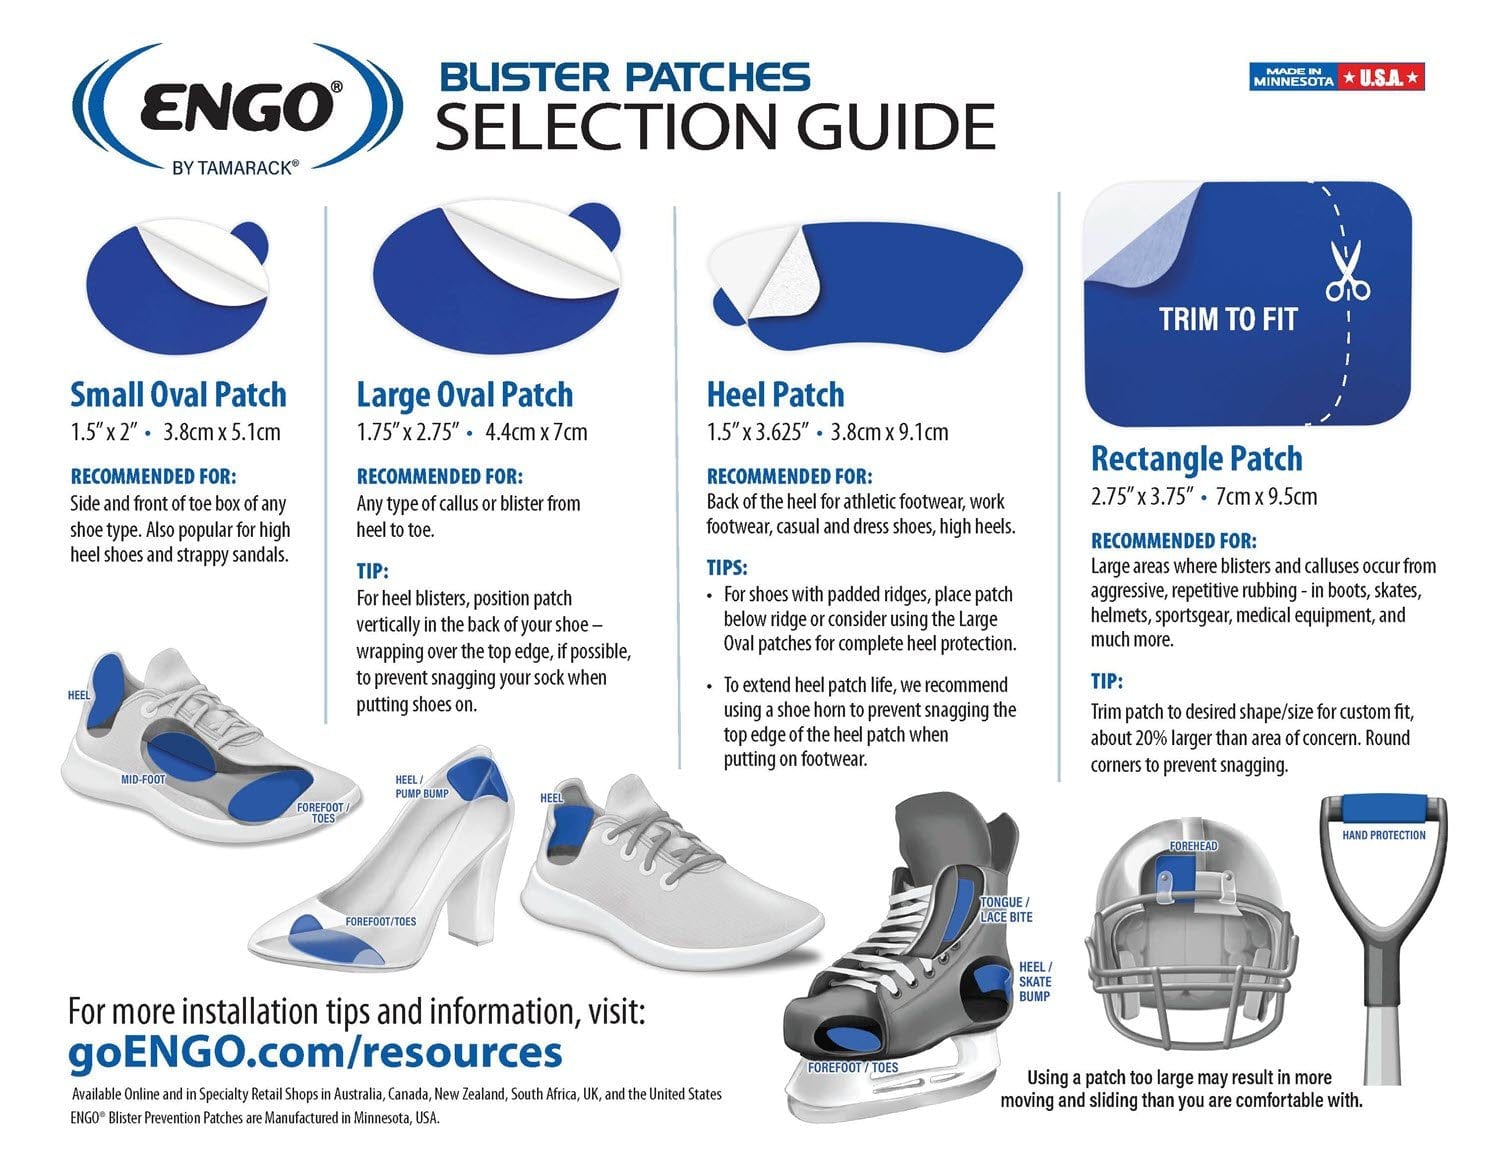
ENGO Patches Selection Guide
Where To Buy ENGO Rectangle Patches
Are ENGO Rectangle Patches the patches for you? If they are, you can grab your ENGO Rectangle Pack or Combo Pack from our online store today. We ship weekdays from both Australia and the US and we’re always fully stocked.
Why I love ENGO Blister Patches
ENGO Patches are my go-to friction management strategy for blister prevention and blister treatment. I love them and I use them myself every day.
- The blue polytetrafluoroethylene or PTFE surface is known to exhibit extremely low friction, as you can see here.
- They’re not going to change the way your shoe fits because they are very thin. In fact, you won’t even notice they’re there!
- But in saying that, they’re extremely durable. You’re not going to wear through them for at least 300 miles, or roughly 500kms.
They truly are unbeatable for long-lasting friction-management.
